Shoring Piers

House Repair Talk

Help Support House Repair Talk:

This site may earn a commission from merchant affiliate links, including eBay, Amazon, and others.

gatorfan

Well-Known Member
Joined
Mar 9, 2010
Messages
56
Reaction score
0
Hi all,

New to the forum, but we recently bought a 1910 house so I'm sure you'll be seeing a lot of me!

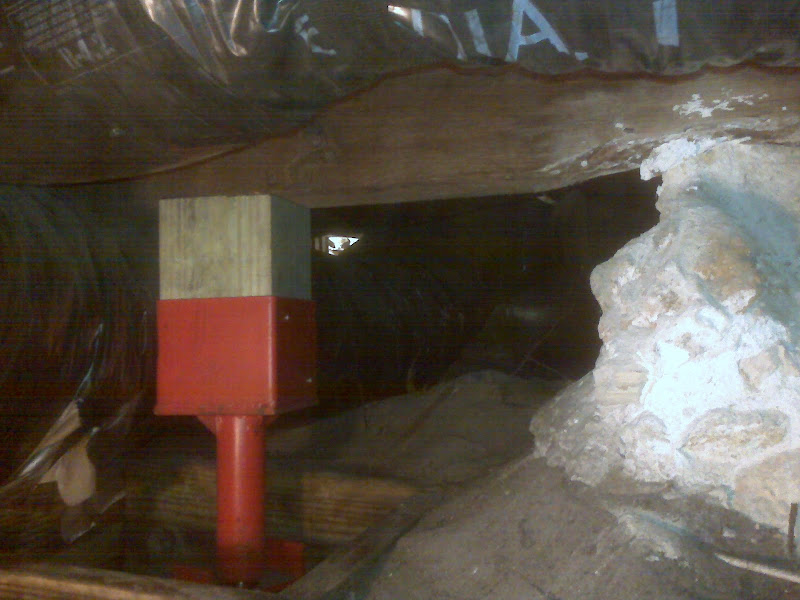
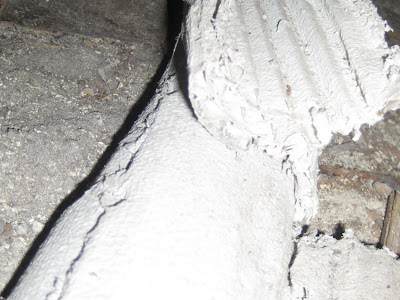
First major project is the foundation. It's a crawlspace with stem walls and one row of supporting piers running down the long axis of the house. Both the stem walls and the piers were built from locally-quarried stone-- in the case of the piers, the higher loads appear to have accelerated erosion, and some are in poor shape.

Eroded%20Pier.jpg

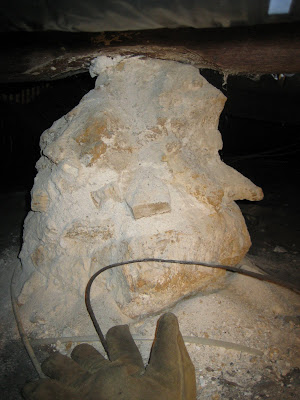
As far as I know, there has never been a water issue-- it was bone dry down there and no sign of running water in the past. There is no significant sagging in the house, all doors close fine, etc.

I'm planning to leave these piers in place and sister them with new piers.

First question: I'd like to avoid jacking the beams as all of the interior walls are plaster. Is it acceptable to use screw jacks as a permanent support? If so I could apply enough pressure to shore the beams without affecting the house as would be required if I built new masonry piers. Ellis screw jacks seem reasonably priced.

Second, if I do use jacks permanently, what footer is recommended? Are pre-cast footers acceptable? I have < 3 feet of clearance in the crawlspace, so digging out a hole to pour a footer would be quite a chore.... For reference, none of the existing footers have any subsoil support and none appear to have subsided.

Thanks,
Matt
 
I have < 3 feet of clearance in the crawlspace, so digging out a hole to pour a footer would be quite a chore.... For reference, none of the existing footers have any subsoil support and none appear to have subsided.

Footers either transfer the vertical force to stable, deep soil or spread the force over a wide area. With your lack of headroom I guess you'll be going with wide, pyramid-shaped footings.
 
I decided to go with 6x6 Ellis screw jacks to match my 6" beams. I also bought pre-cast 16x16x4 solid concrete footer blocks and a 6x6 from HD.

Unfortunately, I hadn't considered that my 3 foot headroom estimation was for me with my head between the joists, so the bottom of the beam was a good bit closer to the ground. As a result, I had to do some excavation to get enough vertical room. Since I was placing these jacks relatively close to the existing piers, I was concerned the excavation would compromise the existing piers, so I bought a length of treated 2x10 and constructed a box to shore the hole.

I had to build the box in the crawlspace due to the small entry hatch. I placed it in location under the beam and dug out the center, using a hammer to move it down by 1" steps. The top 4-5" of soil was very sandy, so there was significant erosion as I dug-- glad I had the box. Ultimately, I did hit well-compacted soil, so I think it was good to do the excavation anyway.

Once I had the hole deep enough, I dropped in the concrete block, a piece of asphalt roof shingle to help spread the load between the steel of the jack and the rough block surface, the jack, and a section of 6x6. I had planned to use an Ellis purlin joiner to create a strong connection between the 6x6 and the joist, but I ran into some excavation issues-- large, live roots that I didn't want to cut-- so I opted to skip the bracket. I believe the roots pre-dated the house as there wasn't evidence of water. In hindsight, the hole would not have needed to be as deep w/o the bracket as I would have only needed an inch or so of exposed 6x6. But, it was easier to dig another few inches rather than re-cut the 6x6.

A few twists of the jack and it was done. I gave it about an extra 1/2-turn using the hammer as a lever, but I don't plan to do any actual jacking. The floor above is level, so this is just for safety.

IMG00039.jpg

I've since done one more and it went smoothly as well. It takes about an hour per pier to do the excavation and set up the jack. The biggest work, which I've already done, was getting all of the materials into position. Each block weighs 50+ lbs and each jack 22 lbs. I had to make multiple trips and the furthest pier is almost 40 feet from the closest access hatch. Excavating is tedious but not strenuous.

In any event, both "scary" piers are now shored, so the remaining four are just for completeness. I'm going to be glad once this project is done, but the end is in sight.

Cheers,
Matt
 
I installed the remaining three jacks last weekend. Now that I had the procedure down, I was able to do them all in a bit over three hours. Not fun work, but not particularly strenuous either as all of the materials (except the excavation box) were already in position. Digging was the easy part-- pushing five 50+ lb blocks up to 40 feet (plus five 22 lb jacks) on Day 1 was miserable. There is not even enough room to move on hands and knees so it was all belly-crawling.

Here's a better view of the base of the jack system. I switched to 2x8 excavation boxes as 10" was more depth than I needed. I cut sections with 45-degree edges and fastened them with 2x galvanized 8d nails at each corner. After digging and hammering down the box to get it even with ground level, I flattened the hole bottom, dropped in a 16x16x4 solid concrete foundation block (from HD), a piece of asphalt roofing shingle (to help spread the load in case there was a high point on the block), the jack, and a section of 6x6 (not visible in this photo).

IMG00046.jpg

I did not fasten the jack to the concrete block nor the beam. I was concerned about weakening the block if I drilled it, and I don't expect there will be any lateral forces anyway. Due to the age of the beam my purlin splicers were too narrow, and I decided toenailing wouldn't do much good.

A few cranks of the jack got it in contact with the beam, and I used the hammer to give it an extra 1/2 turn. I'm not planning to secure the screw, but I will check it from time to time to make sure it hasn't backed off. Lots of work yet to be done under there (knob and tube has got to go!) so I know I'll be back often.... Since I'm not actually raising the beam, it's more of a relief to have them backing up the existing piers than any visible improvement.

Next project: hiring someone to get rid of all of the asbestos pipe blankets down there and in the attic. Some of the ones in the crawlspace have already disintegrated to the point where they've fallen on to the dirt. I wore a P100-class respirator while I did all of the above work just in case....

IMG_2208.JPG

Cheers,
Matt
 

Latest posts

Back
Top