Living room pics

House Repair Talk

Help Support House Repair Talk:

This site may earn a commission from merchant affiliate links, including eBay, Amazon, and others.

NogaroS4

Member
Joined
Mar 28, 2008
Messages
20
Reaction score
0
Thought I would post up a couple pics of what I have done so far... Now that I don't need to work on my car I feel having the opportunity to share what I have done will light a fire for me to finish... There was ungodly wood paneling in my living room and I HATE wood paneling, so one day I decided to rip it out and had this to work with... I plan on smoothing out all my walls in the house since you can't reproduce the texture accurately. Also putting bullnose on all corners... wish I had not went this route as it has been a little harder and longer than expected but hey... it will look great once done right!?!?!?

DSC00265.jpg


DSC00306.jpg


DSC00321.jpg
 
Some of when I decided it was time for the popcorn to be history...

DSC00328.jpg


DSC00327.jpg


DSC00329.jpg


This last one is from the entry way... It had wood paneling half way up and the last half was wallpaper... That was the first venture and did not take any pics...
 
HAHA!! She was camera shy! Guess I should have rotated the phot b4 posting it too... my bad
 
Hello Nogaro:
Whoever built your house was arch obsessed, wern't they?
The purpose of any texture on a ceiling is to cover a less than perfect finishing job on the drywall. It looks like you have a handle on that and can make the ceiling smooth enough to paint.
I prefer to paint with latex enamel but most builders say flat paint is more forgiving on the drywall finish.
Glenn

I am not looking forward to smoothing out the ceiling... I may just pay someone to do that job, I have completed about 5 walls now and am getting burnt on it... the ceiling will be the worse, being vaulted and all...
 
Don't let the drywall discourage you. The key to an easy drywall job is to trowell the finish on as smoothly as possible, maybe even going over some places again with the trowell to knock down any ridges. Then, to smooth the joints, use a damp sponge instead of sandpaper; it disolves the ridges and allows that compound to fill in any holes left. Besides, it makes it easier to breathe.
Another little trick is to lightly spray the ridges and scrape them off with the 6" knife. My son taught me those little tricks and I've used them and recommended them ever since.
Glenn

Thanks! I will have to try this... the dust get a little much too!! My house has been extremely dusty a few times now... Can't wait for this project to be finished... atleast the rest of the rooms are smaller... I would tackle the biggest room first!! Well, I did the entryway first but whos counting...
 
This thread shows a crown job where the wall corner is rounded (bull nosed)

http://www.houserepairtalk.com/showthread.php?t=780

Thanks!! That helps out a lot... guess I will expect to waist some product before I figure it out, testing the corner pieces and all. That pic on there helped me visualize it too!! Almost makes me want to get to it tonight... still need to finish the ceiling in the hallway though. Ironically thats the only place where I will have to cut bullnose crown...
 
Wow! That's really neat. I love seeing the work you're doing. It's very cool.
 
It has been a year since I last logged on, lots has happened. I stopped coming here when I was sent to school by the AF and have not done much to the house until recently. Here are a few pics of the living room in it's current state. Still have not touched the ceiling!! HAHA!! Will also start a new post, started working on the kitchen even though the living room ceiling is not finished. Also, to add some mood lighting, I am going to crown mold this with a straight line across the walls (not running up the ceiling) and put some lighting inside the molding so that it shines up on the ceiling. I think it will add a great touch to the room, perfect for movie watching!

Picture016.jpg


Picture017.jpg


Picture019.jpg


Picture020.jpg


AJ
 
Keep at it! It looks good - smooth. I wish that I would have seen this thread last year when I was mudding. Glenns tips would have come in handy. I normally don't look at decor & painting. You mentioned moulding - I like the clean angles in your house without the moulding - just my opinion.
 
SPI,

I will keep in mind what you said about the clean lines. I am going to have to get a quote on wiring so depending on the quote for the lights it may stay as is. I just want a more modern look in a 31 yr old home, hence the bullnose :)
 
NogaroS4:

Here's a few tips that will make your drywall smoother and flatter:

1. If you're buying joint compound in a premix (in a box or pail), don't be scared to thin it with water. I've always used Synko Pro Set 90, which comes as a powder in a bag, so I've always mixed it to a consistancy that was easy to spread. The first time I tried using a pre-mix, I was convinced you needed to have the arms and wrists of a mountain gorilla to use the stuff. The reason the pre-mixed joint compounds are so thick is almost certainly because neither the manufacturer nor the customer wants to pay more for shipping water across the country. The manufacturer knows that you can always thin the stuff yourself, but you can't make it thicker. So, they sell it so that it's almost too thick and stiff you use, and it's up to you to thin it as desired.

I use a kitchen mixer blade set in an electric drill to mix joint compound and you can use the same thing to thin your pre-mix with water. Any place listed under "Appliances, Small" in your yellow pages phone directory will repair kitchen mixers and will save up some old blades for you if you ask politely. Just put your mixing container inside an empty cardboard box beside a pail of water. That way if any joint compound comes flying off the mixer blades as you're mixing, it'll be contained inside the cardboard box. And, you can quickly and easily clean the mixer blade by spinning the blade while submerged in the pail of water. Spin the excess joint compound off the blade by spinning the blade inside the cardboard box, and then clean the rest off by spinning the blade in water.

2. ALWAYS, ALWAYS, ALWAYS apply your joint compound and scrape or sand it down with the aid of a strong light close to the wall or ceiling your working on. The sharp lighting angle exagerates the roughness of the surface, giving you a much better idea of where you have to add and remove material to make the surface smoother. When the surface looks "decent" under such critical lighting, it'll look good under normal lighting. When it looks good under critical lighting, it'll look absolutely perfect under normal lighting.

3. Don't JUST use a sanding screen instead of sandpaper. Go to any place that sells machine shop supplies and ask if they sell Scotchbrite pads (or competitor's equivalent). Machinists use these for polishing metal after machining it. 3M makes the standard green and white Scotchbrite pads you see for sale in grocery stores for scouring pots, but they also make a wide variety of Scotchbrite pads in various sizes, various weaves and with different abrasives impregnated into the nylon fiber the pads are made from for other industrial purposes. You can buy a grey "Ultrafine" pad with a very open weave in a 6 inch by 9 inch size at places that sell machine shop supplies. Slip one of these between the sanding screen and the holder so that the sanding dust goes THROUGH the screen and into the Ultrafine Scotchbrite pad. Cut the pad to size so that the sanding dust falls out the side of the pad when you turn the tool horizontal and tap it gently against the wall. This will greatly increase the speed at which you sand because the dust won't clog the screen.

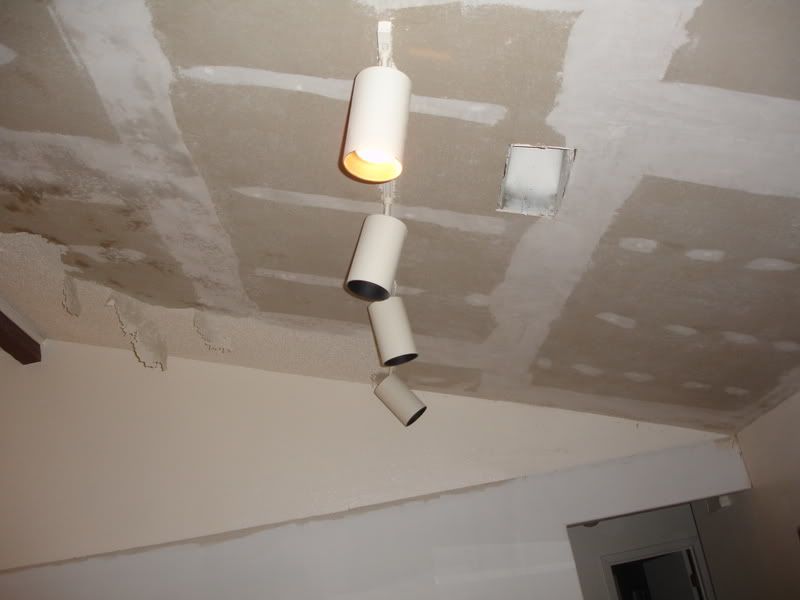
4. On butt joints, where you don't have a contoured edge on each side of the joint in which to bury your tape, use a "curved trowel". A curved trowel looks (at first glance) like an ordinary 5" X 11" inch plastering trowel. But, when you set it on a flat surface or sight along it's edge, you notice that it arches upward about 1/8 inch in the middle. (that is, the blade is curved kinda like a very slightly bent playing card) Since you hold the trowel at a comfortable angle to the wall when using it, a curved trowel allows you to spread a perfectly smooth and symmetrical "mound" of joint compound over a butt joint that's only about 1/16 inch thick at it's middle. That's way more than you need to bury a strip of fiberglass mesh tape, but it's not nearly enough to cause a visible "bump" in the wall, even with wall mounted light fixtures.

This is a "curved trowel":
IG05607.JPG

Notice how it arches up about 1/8 inch in the middle. This allows you to spread a smooth and symmetric "mound" of joint compound about 1/16 thick at it's middle over a butt joint.

5. If you use premixed joint compound, you'll find the compound comes in three "types":
a) "Regular" or "Taping" joint compound has the most glue in it. It sticks the best to the walls, but also dries the hardest and is therefore the hardest to sand smooth.
b) "Topping" or "Finish" joint compound has the least glue in it. It doesn't stick to the wall as well, but it dries soft and is the easiest to sand smooth.
In a perfect world, a drywalling contractor would use Regular joint compound for taping the joints and filling drywall screw dimples. Then, he'd use Finish joint compound for both subsequent coats to fill in the shrinkage of the first coat and prep the wall for sanding. (I typically just scrape the first two coats down with a putty knife or paint scraper, and save the sanding for the final coat.) However, for small jobs, most contractors will do the whole job with:
c) "All Purpose" joint compound, which has a "medium" amount of glue in it, and is therefore a compromise between Taping and Topping joint compounds. It sticks OK and isn't too hard to sand smooth.

In my humble opinion, instead of buying different pre-mixes for different purposes, it makes more sense to buy a "Finish" joint compound as a powder in a bag, and a gallon of Elmer's white wood glue. Mix some white wood glue into some water, and use that solution to mix your powder. The more glue you put in the water, the better your joint compound will stick, but the harder it will dry. The less glue you put in, the softer and easier to sand it will be.

Once you get used to mixing joint compound from powder, and using white wood glue to modify it for different purposes, you'll find this system better than using different boxes of joint compound for different purposes.
 
Last edited:
I have yet to thin the mud... Maybe I should!! Might make my job easier. Thanks for all your tips! I will keep the forum updated when I make progress. As you can see it took me a year last time but hope to take less time with the kitchen. I still am thinking of contracting out the ceiling. I know I can do it but I am only one man, with a business it will be done with a few employees and they will get it done faster than I.
 
Nogaros4:

a) You should thin your mud so that it's comfortable for YOU to spread easily and smoothly. NOBODY is going to do the best job they can if they're working with mud that isn't spreading as easily and smoothly as it could. You'll find that makes a tremendous difference.

b) And, if your going to thin your mud, consider what you're going to thin it with. If, for example, you're mixing up some mud to stick vinyl corner beads on, then dilute some white wood glue in water, and use that solution to thin your mud. Doing that will both make your mud stickier (so everything sticks better) and will make it dry harder and stronger (so that the vinyl corner bead is better supported). Thus, you can thin your mud with an adhesive solution to make it stickier and dry harder and stronger where you need these characteristics.

c) Please don't take this the wrong way. Lots of people in this forum are telling you what a "great job" you're doing. I have the same problem. Prospective tenants coming to look at apartments in my building will tell me what a great job I've done renovating them. However, I am forever reminded that the people who are telling me I'm doing a "great job" don't know anything about the work I'm doing and can't tell a lousy job from a great one. They're forming their opinion strictly on appearance, but that's not the only aspect of the work that makes the difference between a great job and a lousy one. If it were, then everyone born with at least one eye would be equally able to assess the quality of my work, and knowledge about how it was done wouldn't count for anything. I've been tempted at times to engage these people in a conversation about ceramic tiling or installing vinyl composition floor tiles or plastic laminate countertops or installing carpeting so that they would see for themselves that their commenting on what I'm doing is kinda foolish cuz they don't know the first thing about it, but I understand that they're simply trying to be friendly and supportive in the only way they know how, so I should just be courteous and polite about it.

To tell what kind of a job you've done on those walls, what you need to do is look at the wall before priming and painting with the illumination from a sharp angle to make any glitches and imperfections show up. That's the way to determine if the plastering or drywalling work was well done. If there's a glitch big and bad enough to see in a digital photo under normal lighting, then it was a terrible job of plastering. Not seeing such a glitch in your photos doesn't make it a "great" job. (Again, my intention is not to criticize. Only to be realistic about what you need to look at to be able to tell if work is good or not.)

Work with a bright light near the wall you're working on (but some distance away) to show your work in the worst possible light and you'll be surprised at how much worse the wall looks, and how much better you can make it look. Then, under normal lighting, it'll look perfect. You'll find this makes a tremendous difference too.
 
Last edited:
A little update, less pics, I have not touched the living room since the last pics posted but have been going to town on the kitchen/dining room. I bought some mud that was on sale at lowe's, who would know I would like the way it spreads and that in one day the whole pallet would be gone... oh well, kitchen is coming along.
 
If the drain piping for the kitchen sink is exposed so that you can make changes to it, then you'd do well to add a "clean out" for the kitchen sink drain.

That way, if you need to clear the kitchen sink drain line, you can run the snake into the clean out and run water down the kitchen sink drain pipe at the same time to more effectively clear the drain pipe.

If you do decide to add a clean out, check with your local plumbing code as to whether you can use 90 degree elbows in making it or whether you have to use 45 degree bends. Apparantly using a 90 degree elbow on a drain line can be against the plumbing code because of the potential problem getting a snake around a 90 degree bend, or getting it stuck in a 90 degree bend.
 
Back
Top