nealtw
Contractor retired
I don't know,. bondo would be more for dents, it's like fixing drywall.


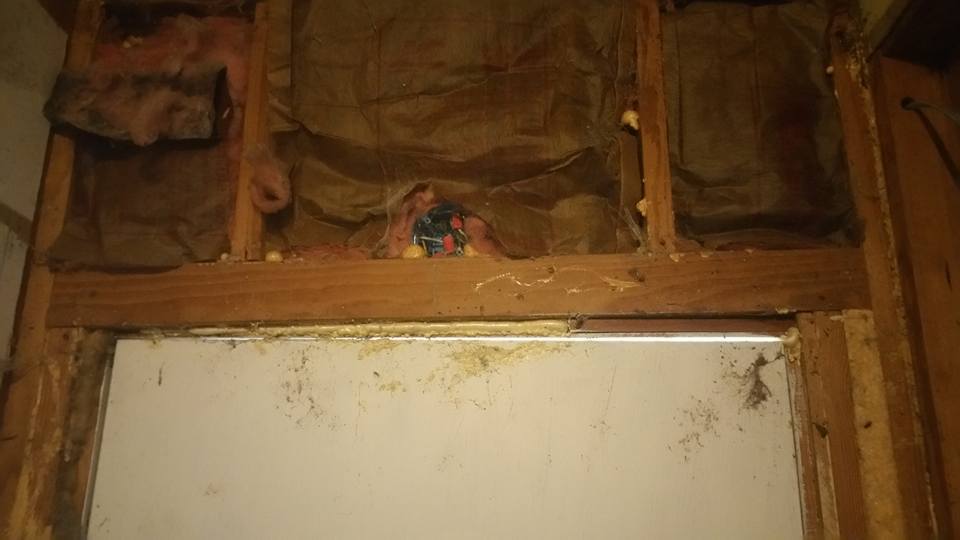
This will work fine and there is something goofy about that light box too.Last time I went down to the workshop I did another coat on the exterior side of the door but accidentally scratched the inside part which had been finished (I was trying to flip the door over on it's side and it slipped and fell and hit something-- scraping paint off). I'm going to get my 2nd moving blanket and carefully wrap the door in it before I try flipping it again. Some of the paint peeled off when I removed the tape from the pet door so I did some touch-ups. I used the white paint over the dremel marks on the pet door. I'll probably paint the exterior pet door white as well just to protect the plastic from the sun. It's been cold and rainy so I haven't gone back down to the workshop. Got a bit of a virus my brother brought home from work & have been trying to stay hydrated. I've been cleaning up inside the house instead, but I really need to get to the back door area.
Looking at the pictures I realized I don't have enough room to sister up new king studs like I wanted.
The new threshold will sit on the subfloor, not like the old one.
So, I'm wondering if I need to replace the existing ones entirely or if I can build up on top of them using 2x4 blocks.
Question: Do the king studs have to go all the way up to the header uninterrupted or can I have a 2x4 brace for the top of the door frame sandwiched in between? So, I'd have it like the current situation where the king studs go up to the 2x4 but then I'd have another 2x4 on top going up to two 2x6s sandwiched together as the header.
View attachment 23202
or should I slightly notch the king studs (less than halfway through) to fit the 2x4 in- creating a large dado)?
View attachment 23203
Or should I just make the header wider and trim the studs that currently go all the way to the ceiling to put the header in?
If I do the first one, I will sister the king studs to the main studs that support the ceiling since they are right next to one another.
Oops. I've been using the wrong term. Thanks! King studs for all the way to ceiling-- jack studs for the header. I'll try to remember that.This will work fine and there is something goofy about that light box too.
BTW, the king studs are the tall ones on each side and the ones supporting the header are jack studs.

Don't start on the header, you may have things to fix at the floor that would or could change measurements for the door.Oops. I've been using the wrong term. Thanks! King studs for all the way to ceiling-- jack studs for the header. I'll try to remember that.
Goofy? Reminds me of an off color joke about Mickey Mouse divorcing Minnie Mouse. LOL. It's a DIY job. I'm not sure what sort of box should be there. Worst case scenario, I can replace it with a different type of box. I'm going to have to bump it up a bit for the 2x4 to be adjusted.
I need to measure again to see if both of the jack studs are too short or if it's just one of them.

A plastic box is okay there too, just don't see them very often.Neal, Ah, Ok. I thought the box being plastic was a problem. The light that used to be there was fine but it got destroyed by flying debris during a hurricane. Never got around to replacing it. I'm seriously thinking of just replacing it with a solar powered light instead.
Good point about working on the floor first. I really need to replace the light bulb in the fixture in that area so I can see better and work on clearing out the crap in the hallway. I really need to suck it up and stop procrastinating on that front.. It involves a lot of bending and I won't have any help on it-- and it's mostly my brother's stuff. I need to see what to throw away, what to wash & either store in bins or donate. Unfortunately, I won't have any help on it, which is frustrating.
Enter your email address to join: