


Hi everyone, I wanted to get some professional opinions on a siding job I had done about 10 mos ago on my dad's house.
http://s873.photobucket.com/albums/ab293/dustydelrosario/siding/
Here are some pictures of the things that concern me the most. First of all I pulled one of the nails that were used as finish nails throughout the entire job and took it to the Lowe's hardware dept and asked what kind of nails they were. They were paneling nails used for the indoor wood paneling you see in older homes. All of these nails are rusting as you can see from some of the pictures.
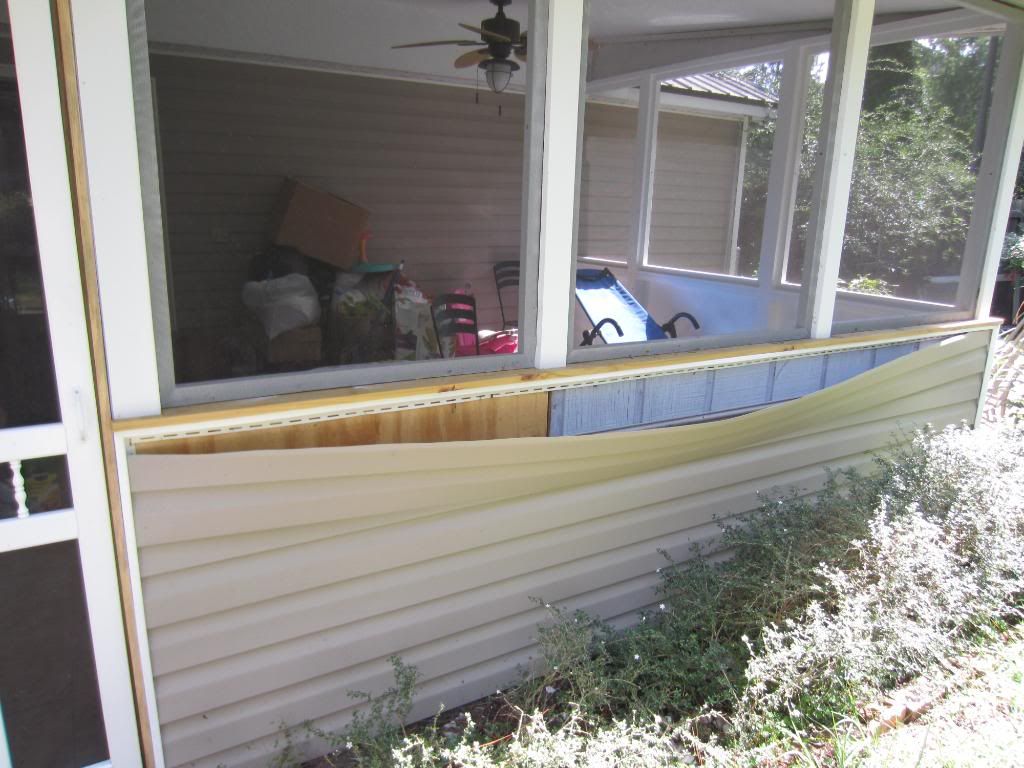
None of the top pieces of siding are nailed. I noticed this and complained and the installer came back and nailed under the bottom lip that snaps into the piece under it in a few spots to keep the top from sliding off. As you can see from the picture, that didn't work so well. From what I've seen on the internet it looks like the proper way is to use some sort of hole punch tool to put holes along the top edge for nailing. Is that correct?
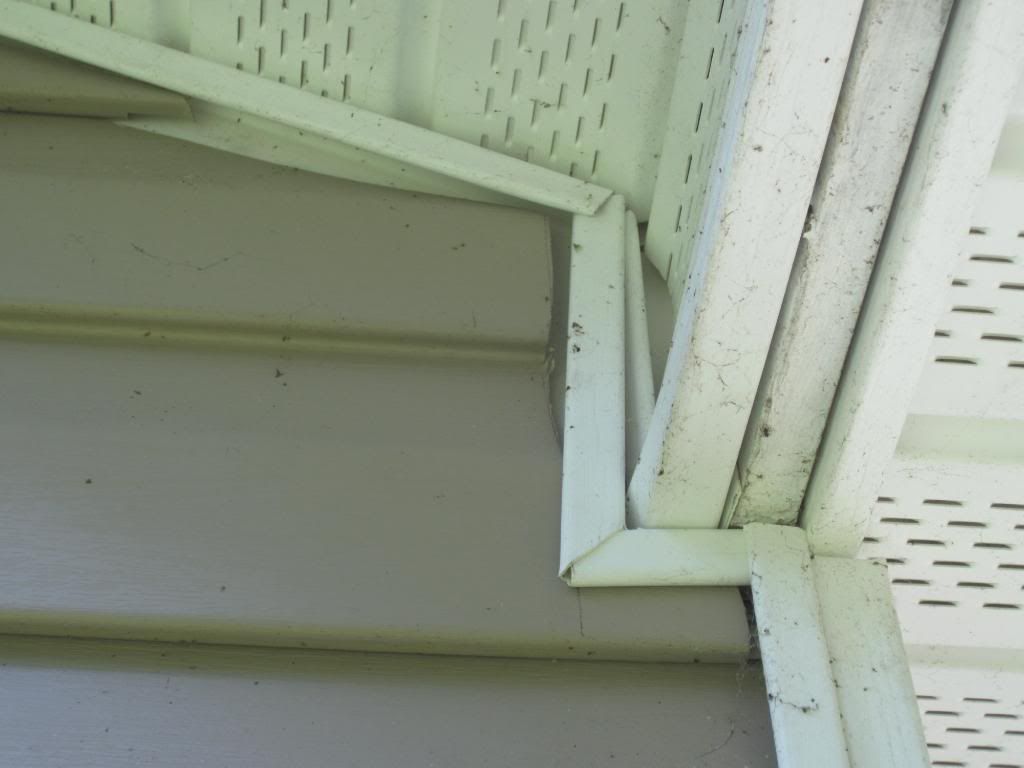
Sometimes they mitered the corners of the j-channel, sometimes they didn't.. I don't see any reason not to miter it, but is it common practice to just butt the joints like this?
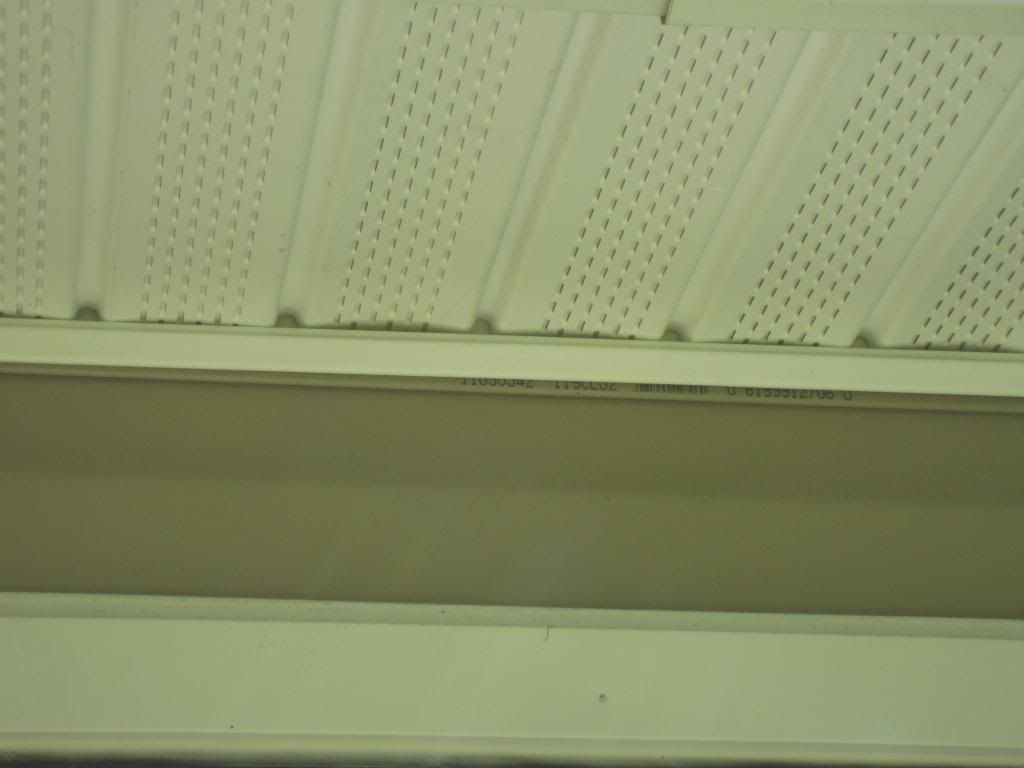
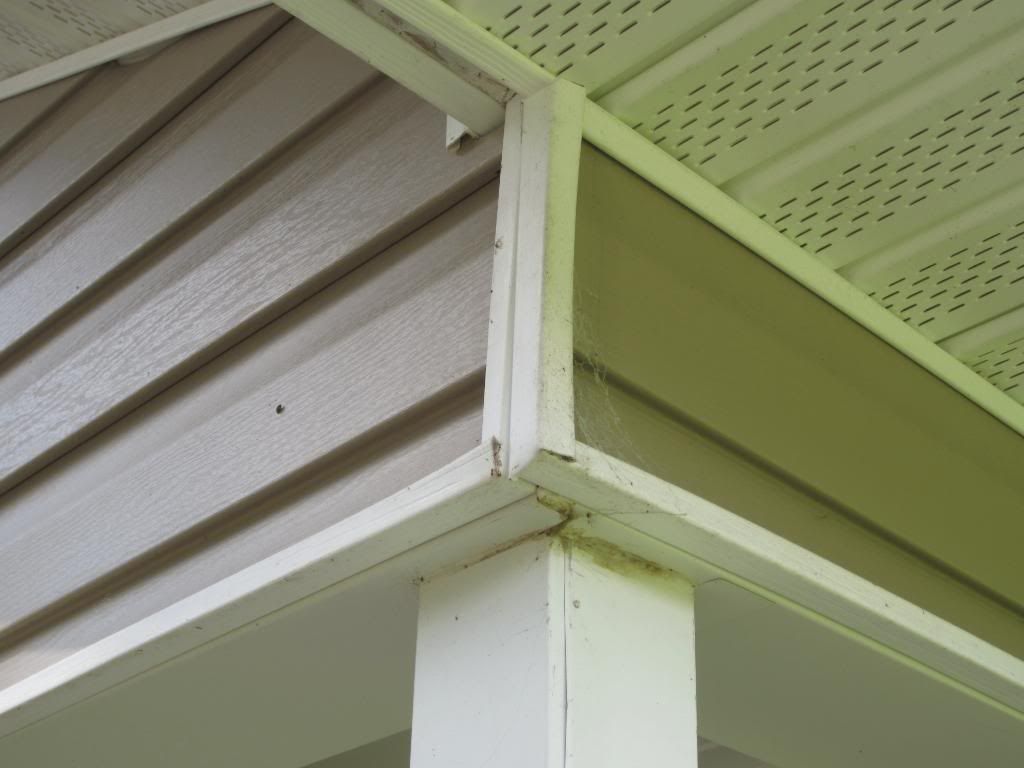
This shows the j-channel on the soffit and on the wall creating an awkward corner along the entire run. I just wasn't sure if this was the best method for doing this. And also the top piece has that serial number stamp on it hanging out, is there something they should have done differently here?
Siding was cut short in a few places, this one was particularly bad. The whole area just doesn't look very professional to me.
http://s873.photobucket.com/albums/ab293/dustydelrosario/siding/
Here are some pictures of the things that concern me the most. First of all I pulled one of the nails that were used as finish nails throughout the entire job and took it to the Lowe's hardware dept and asked what kind of nails they were. They were paneling nails used for the indoor wood paneling you see in older homes. All of these nails are rusting as you can see from some of the pictures.
None of the top pieces of siding are nailed. I noticed this and complained and the installer came back and nailed under the bottom lip that snaps into the piece under it in a few spots to keep the top from sliding off. As you can see from the picture, that didn't work so well. From what I've seen on the internet it looks like the proper way is to use some sort of hole punch tool to put holes along the top edge for nailing. Is that correct?
Sometimes they mitered the corners of the j-channel, sometimes they didn't.. I don't see any reason not to miter it, but is it common practice to just butt the joints like this?
This shows the j-channel on the soffit and on the wall creating an awkward corner along the entire run. I just wasn't sure if this was the best method for doing this. And also the top piece has that serial number stamp on it hanging out, is there something they should have done differently here?
Siding was cut short in a few places, this one was particularly bad. The whole area just doesn't look very professional to me.
 to
to