Cutting/installing glue down cork

House Repair Talk

Help Support House Repair Talk:

This site may earn a commission from merchant affiliate links, including eBay, Amazon, and others.

swindmill

Well-Known Member
Joined
Jan 22, 2010
Messages
220
Reaction score
14
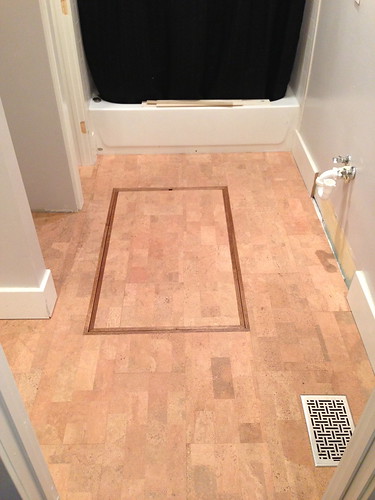
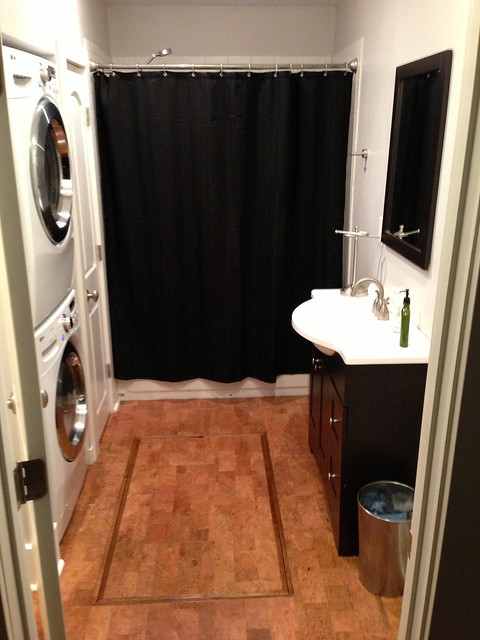
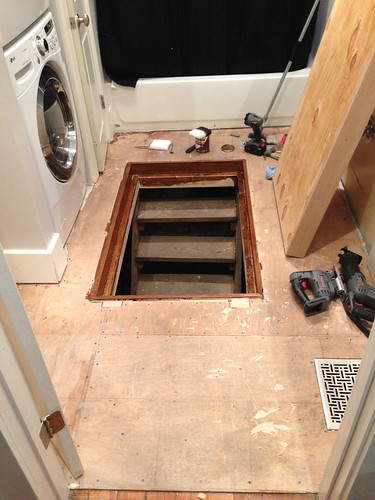
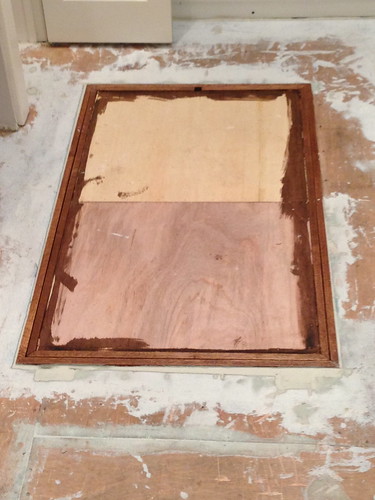
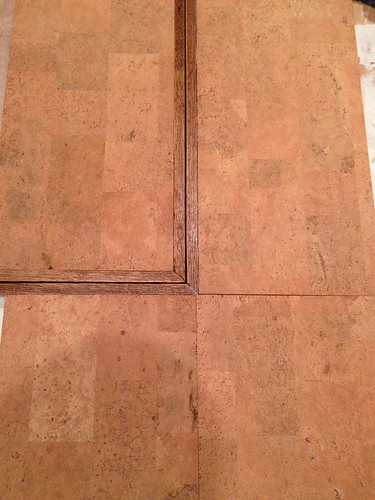
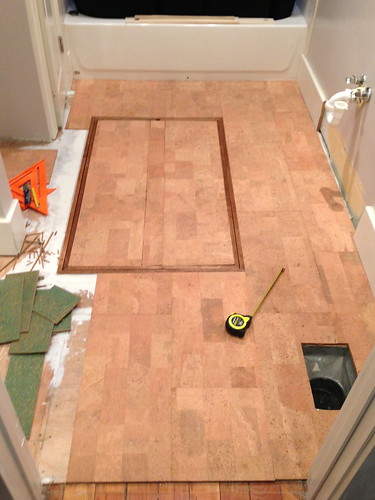
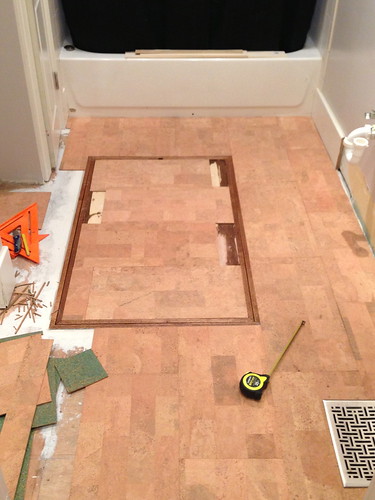
I have my floor ready to install 12x24 glue down cork tiles from Duro Design. My bathroom floor is unique in that it has a cellar door right in the middle of it. Whoever last built a door and installed vinyl tile did a very poor job of building the door and blending it in with the floor. I have built a new door using oak trim that should blend in with the cork. I built it so that the oak trim around and within the door is sitting just above the floor and will be level with the cork once it's laid. I've posted a few pictures to show the door and what it should look like when finished. My problem is going to be cutting the cork around the door, and within the door. I'm concerned that the cuts will have to be perfect so that the tiles fit tightly against the oak trim in the floor. I have never installed this type of flooring, and I guess I'm looking for any advice on how to best do this. The flooring uses an adhesive that is rolled on the floor and left to sit for a time before laying the cork. Should I do a test install: lay the floor without the glue, doing all the cuts before rolling on the adhesive? Thanks for any ideas and advice. I am planning on using a basic utility knife and a 12" square to cut the 3/16" cork tiles.

8488852629_926ab500f7.jpg


8489946692_495c165365.jpg


8488846767_e752fe48de.jpg
 
Nice job so far. I would go the route you suggested. Cut and dry fit everything you can before rolling on adhesive. Maybe do the area against the tub and out to the corner as a first stage, then proceed from there.
 
Since posting this, I've realized that the wall to the right when looking in from the door is not even close to square. That's an exterior wall on a 110 year old house, so that's no surprise. Anyways, I was thinking that I could square off of the right side of the cellar door, which would save me from having to cut around that side of the door, as I can just butt the tiles up against that side. The only issue is that the small space left between that column of tiles and the right side wall will create a decent amount of wasted flooring. I think I have enough to waste some, so that's not a huge deal. That would leave only the left side of the door that I would have to cut tiles to fit around.

You suggested starting at the tub; I suppose it's recommended to start with full tiles at the tub rather than the door? I'll be using a brick pattern, but you know what I mean by "full tile".
 
I have never worked with the exact flooring you are using. I am assuming that your joints will almost be hidden. Not obvious anyway. I would use the end of your door opening and fit back toward the tub. It looks like you could stand in the opening and reach back to the tub. Before deciding where to put your seams try to balance the floor area where you will not have a narrow strip at either wall or the tub. Sometimes it works out well and other times not so well. If you can get it to work use your drops from the right side finish out the left side. And sometimes you just have more waste than you want.
 
I'm off to a decent start, and so far I haven't wasted a tile with a bad cut. I'm now stuck trying to decide how to do the cellar door. I'll either have a small strip down the middle, like this:
8489748895_2a9707b6b8.jpg


Or, I could turn the tiles sideways, and cut them into whatever design I want.
8490847672_3f83663509.jpg


I don't like the change up in patterns when turned sideways, so I'm leaning towards the strip down the middle. The only other option I have is to cut six tiles to identical widths and lay them vertically, but that would require more tile, and some very precise cutting.

I bring this up here, because I assume flooring guys must run into this type of thing somewhat often (not a cellar door, necessarily).
 
I'm late to the party, but that's never stoped me before.
I would draw center lines on the door both ways and extend the lines out to the edges of the floor. You can either start with a full tile on each side of the line or center a tile over the line, which ever works out without giving you slivers to work with. Generally you want just less than half a tile on each side but in this case I think it should work with the door first and the vanity will hide most the far side anyway. Making it look like you cut the tile to allow for the frame is what I think will look best.
 
I like that advice, but I've cut too many tiles to start that way now. It actually came pretty close to turning out as if I did that way, if I'm reading your suggestion correctly. My only remaining problem (aside from cutting around the closet and washer/dryer alcove) is finding a way to fit tiles on the cellar door, as I posted above. The seams are not very noticeable, so I suppose it's not a huge deal. When the tiles are glued and rolled, the seams may be very difficult to see.
 
If I go back more than a few years ago, we tiled with the old 9x9 lino tiles. To get the close fit to wall, you tiled up close with full tiles and the set another tile on top of the last one and then set a full tile up against the wall on top of that one and sribe a line with a knife at the back of that on the one under it. The peice sticking out will be the peice that fits the hole.
I'm sure that could have been said with less words, I hope it helps.
 
I agree with you that the strip down the middle is not the most attractive. Can you center the two full tiles and split the center strip into two pieces, one for each side? Or can you line up the stripes in the tiles with the strips in the floor off the door and end up with a strip to one side? That way you can keep factory edges together in the middle and have your cut edges next to the door frame. I think that will show less when finished. Is that a little clearer than mud? Looking good so far.
 
I think I'll end up going with Fireguy's second suggestion: lining up the lines with the rest of the floor. I'll have to cut off a 1.5" strip from two full tiles to run down the right side and then I'll have a small strip on the left side, but it will match the lines running from the door to tub. All I have left to cut is the door tiles at this point, but my knees have given out on me tonight.

Any suggestions on how to pull this up in an orderly way so that I can roll the glue down and not forget what pieces go where? I'm thinking one pile for each column, but even that is going to get confusing. The glue sits for 30 minutes before putting down tile, and I'm assuming I can't walk on it, so I'll have to do three sections, one at a time (at least three). Also, I'm planning on glueing down the column that I used to square everything with first; that being the one along the left side of the door. That way the column to the right of that can be pressed against it, leaving any gaps against the wall.
 
Make a drawing of the room a draw in a grid to represent the tiles and number all the square that are cut tiles and when you lift the tiles out put the corrisponding number on the back side. So when you knock over a pile you have a second chance of putting them back in order.
 
Not a bad idea. Certainly worthwhile for the peace of mind. This process takes longer than I ever thought. I guess my cellar door, toilet alcove, washer/dryer alcove, and closet don't make it easy. Glue down and 4 coats of urethane to go.
 
Finished cutting and got everything glued down this afternoon. I ended up with 2 or 3 gaps that are noticeable to me, but probably no else. Poly tomorrow and I'll have the bathroom back on Saturday. Overall, I'm very satisfied and relieved it turned out as well it did to this point. Thanks for the help.

8495516317_57ed368aeb.jpg
 
If someone is thinking of doing this definitely get the locking and floating type of cork they have at Lowes. Youll end up with no seams or gaps.
 
If someone is thinking of doing this definitely get the locking and floating type of cork they have at Lowes. Youll end up with no seams or gaps.

The floating planks are definitely easier to install, but due to issues with the subfloor and the cellar door, I needed something that was flexible and that would adhere directly to the subfloor, which was a major reason I went with cork.

In the event that someone is interested in cork, and comes across this in the future, here is a picture of the completely finished floor (after the polyurethane).

8734668071_57603480cc_z.jpg
 
Back
Top