Re-laminating kitchen countertops

House Repair Talk

Help Support House Repair Talk:

This site may earn a commission from merchant affiliate links, including eBay, Amazon, and others.

ScottH

Member
Joined
Sep 20, 2016
Messages
9
Reaction score
0
Hi everyone,

New member and first time posting here. I've taken some time to research this before posting...

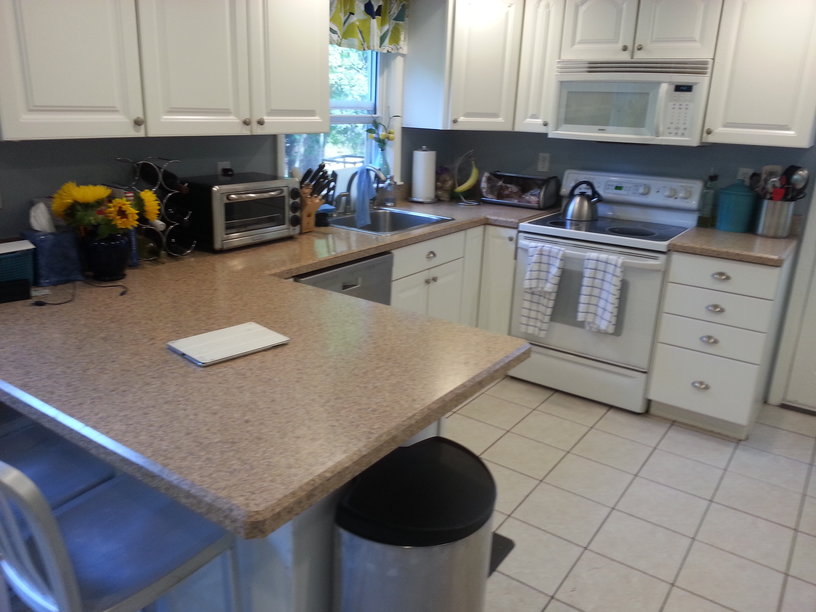
My kitchen has laminate countertops that function fine, but the color doesn't work for me. I want to apply a new laminate color.

I've read quite a bit (including this thread from 2009) and watched a lot of YouTube videos that describe and show the process in detail.

But...

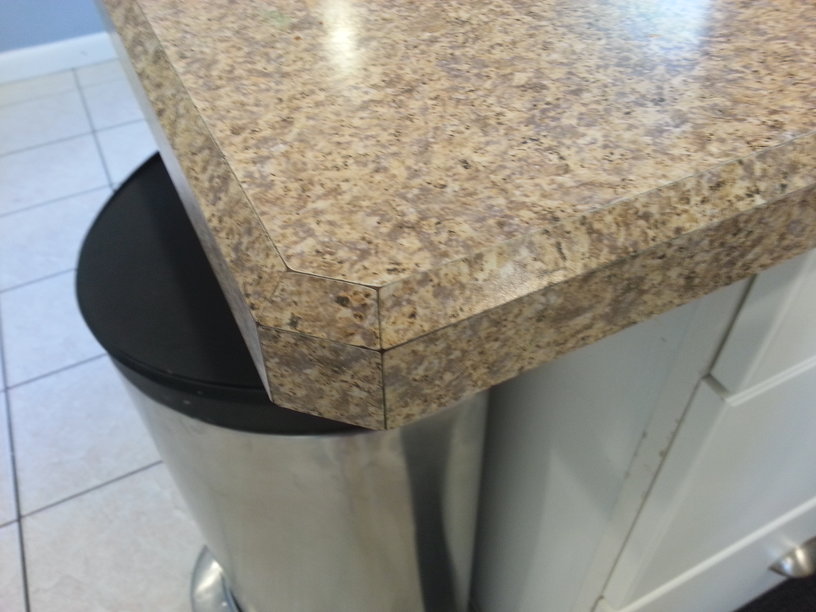
My counters also feature a beveled edge. Everything I've been finding either shows using a router on a straight edge or installing a new beveled edge. I haven't found anything that tells me how to apply the new laminate over the beveled edges.

Is there a way to do this? Or do I need to remove the edges from the existing counters and add new ones? I fear that removing the beveled edges would likely damage the counters and that may force me to consider replacing the counters all together. I'd prefer to keep my expenses down and just apply new laminate.

Thanks in advance for any and all insight!
 
Post a photo of what you have, and welcome to the site.

Thanks for the warm welcome.

Here are a couple of pics:

ZkP966k.jpg


L05DK1Q.jpg
 
Back when we did a lot of that work, there was a few things that were done.
You have the deck, plywood or what ever and then add a hardwood 1,2 around the edge.
Some times you would cover the face and then router the angle with a 45* bit and leave the hard wood showing.
In your case they went one step further and covered the angle too.

If this was done with the deck attached in place the 45* router work would stop 3" from the wall as that is as close as you could get with a router.
So if the router work goes right to the walls then you will likely have to remove it to work on it.
You can remove the old with heat like the wife's iron.
You can go over the old if you sand the surface to give the glue a bit.

You would start with the face and trim that with 45* bit, then the angle trim that with the 45* bit and then do the surface and trim that with the 45*
 
Those beveled edges could be problematic. You don't have a lot of counters there, I'd probably just start from scratch with new underlayment and make new counters. I'd band the counter edges in wood and route a bevel in it and not cover the wood edge with laminate. I'd also use 3/4" plywood as the underlayment instead of using particle board.

One of the many advantages of starting over is you can build the counters without tearing out the old ones limiting the downtime in your kitchen. I've built counters several times and it is a fairly doable DIY project for someone with decent skills and the right tools.
 
The normal process is referred to as "bull nose and back cove" and are accomplished in house, at the fabricator, using a hot press.

In your case the bevel edges are created using a table saw, accurately cutting the bevel pieces on the correct angel and the tricky part is achieving the tightest joint as possible, which will take some level of talent, trial and error.
 
He uses a cheater strip for the edges but there is no reason that isn't done on site.
[ame]https://www.youtube.com/watch?v=DkHemVAkhTU[/ame]
 
He didn't rip the 45's or show them being laminated.

Which is a critical step to the finished product.
 
He didn't rip the 45's or show them being laminated.

Which is a critical step to the finished product.

Those are factory made pieces you buy.
Some come with the tongue and some not so much.
[ame]https://www.youtube.com/watch?v=h_v9yIBEGuk[/ame]
 
In the video, he milled his own, there was no reference to wilson art, and nothing was milled for T&G.
 
They all don't have the tongue and I think all the brands sell them.

But the OP counter does not have that as his was done in three pieces.
 
He uses a cheater strip for the edges but there is no reason that isn't done on site.
https://www.youtube.com/watch?v=DkHemVAkhTU
It's a good overview of the process, and I was able to pick up a few tips from watching. But it's not a how-to video in any way.
The bevel edge portion of the show was very limited. Thanks only to the Wilsonart video for any insight on that aspect.
But it seems pretty clear to me that that the OP isn't going to salvage the old countertop as long as the bevel needs to be refaced.
 
Last edited:
You're right. I am assuming that you need an entire wood shop to do the careful cutting and matching. :hide:

If his is in good shape he just sands it and goes right over the old all he needs is a router , a straight and angled trimmer.
I have built all that back when all I had was a circ saw, a router and an imagination.

The biggest problem he will have is finding all the screws holding down.
 
Wow, this has been quite an education! Thanks so much for the insight.

Is there anything else I should know about using a 45 degree router bit?
 
Wow, this has been quite an education! Thanks so much for the insight.

Is there anything else I should know about using a 45 degree router bit?

Other than it is tricky to hold it square with the base flat against the surface when routering that front edge, no.
 
Back
Top