This applies to new construction, or before concrete flooring.
I spent three years researching before building my new house. Living in central Illinois, one of the main things I was concerned with was heating and cooling. I chose an electric Geo-Thermal system. The cost of this above a forced air gas system was $4000 at the time. I estimate payback next year, being year 4. This did not heat or cool the attached garage.
Since my main garage was attached to the house, there was no way it was going to be cold out there. I'm a wrench guy so this was a must, especially since the house I was leaving had heat in the detached garage. I decided I would heat my garage in two ways. One would be a hot water radiant heating system, the other would be a ventless LP wall mounted heater. The main heating system is the "in the floor" radiant heating system, while the ventless gas system would act as a backup.
I did not build the house but worked with my contractor to schedule time to install the tubing where the concrete floor was to be. I not only installed tubing in the garage floor but also in the basment floor as well.
==================================================
Here is the list of what I purchsed to do the whole job:
PEX tubing 1/2" (there are other brands)(about one foot in length per square feet of area)
PEX clamps
Pex crimping tool
Electric water heater (40 Gal)
Thermostat
Relay
Grundfoss pump
Copper manifolds (One for supply side, one for return side, dependant on the number of zones)
Plywood to mount manifolds
Small pressure tank
Tempurature/Pressure gauge
Water line check valve
Copper tubing for supply side
Shutoff valves (One for supply side, one for return side)(one for each run supply side)(one for Check valve)(all total in this installation is 9)
Styrofoam sheeting (4x8)(Thickeness is dependant on your climate zone)
Heavy wire (9 gauge if I recall)(to be used in bent 2' sections)(act as a stake to hold tubing)
Tools for sweating copper pipe
==================================================
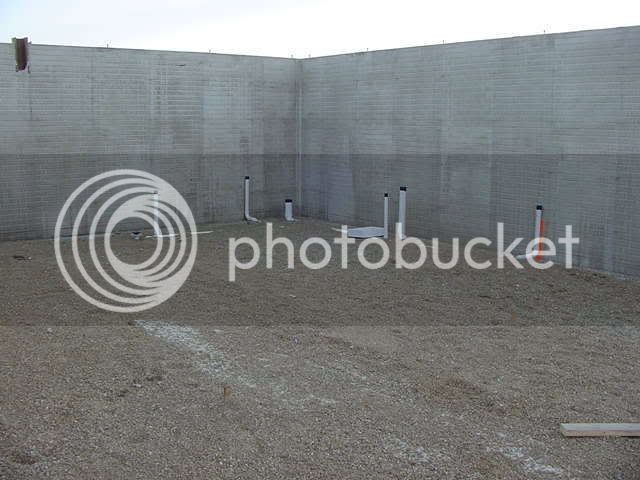
You start with this.

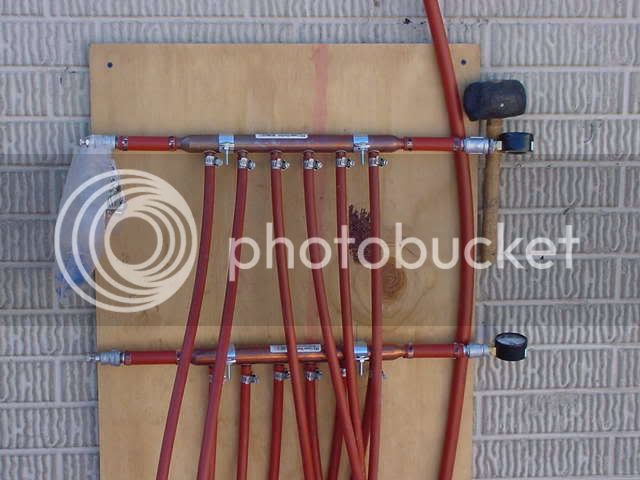
Here the manifolds are mounted to the plywood with tubing runs attached already.

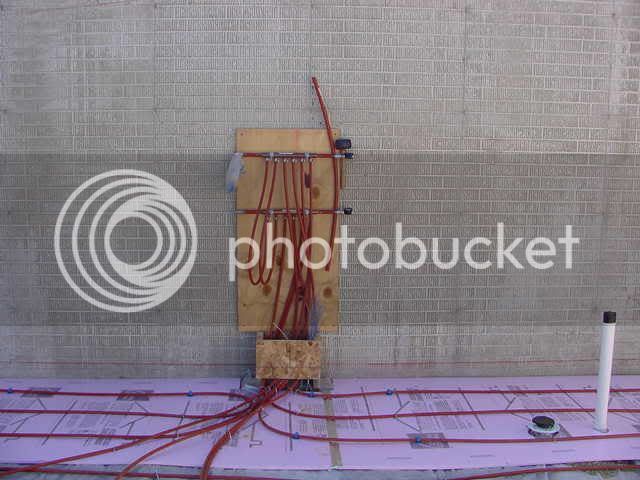
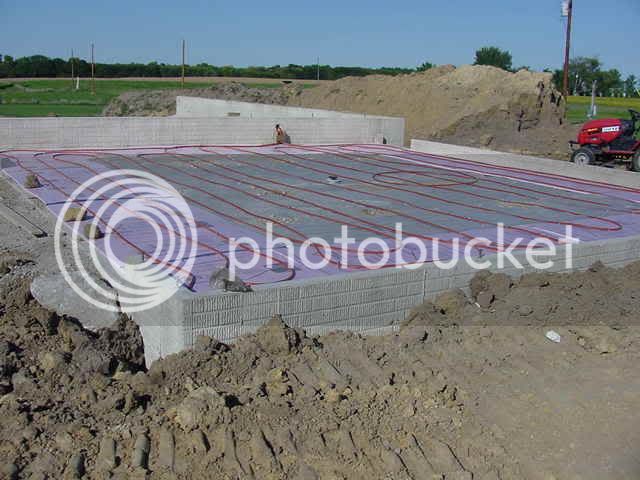
See here where I built a box for the tubing to come up through the concrete so it wouldn't be so rigid at the surface.

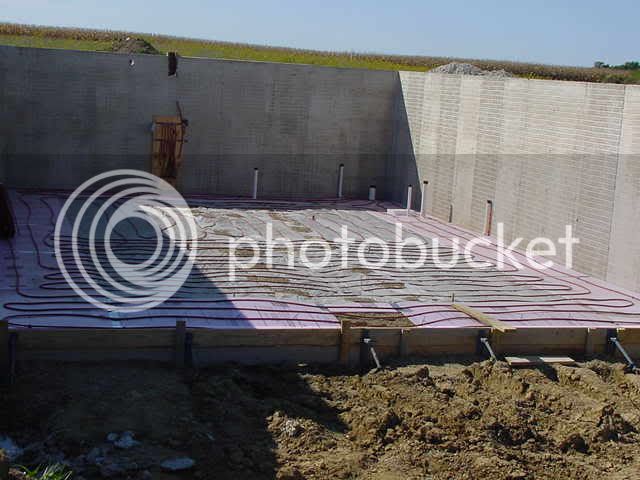
Now layout the styrofoam around the perimeter to act as and insulator from the cold edges of the concrete, then lay out the tubing in a grid. Stay away from the wall 12".

Attach to the manifolds shown above. You notice there are six tubes on the supply side and six on the return side. Of the six, four go to the basement

and two go to the garage.

You can buy clamps that screw into the insulation to hold the tubes down, but they did not work for me. I used the 9 gauge wire, cut 24", then bent in half driven down over the tube to hold in place.
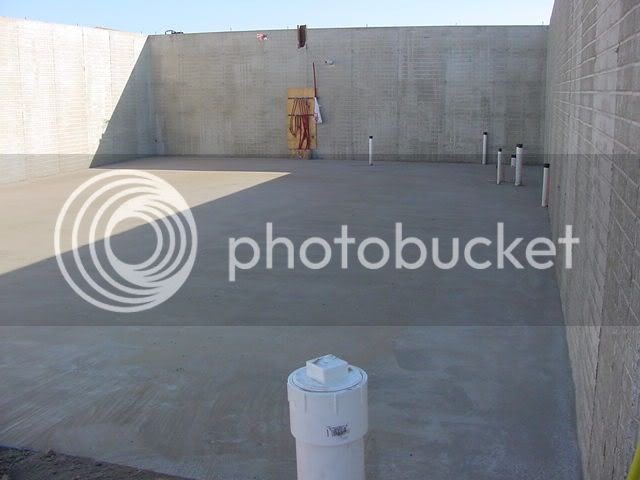
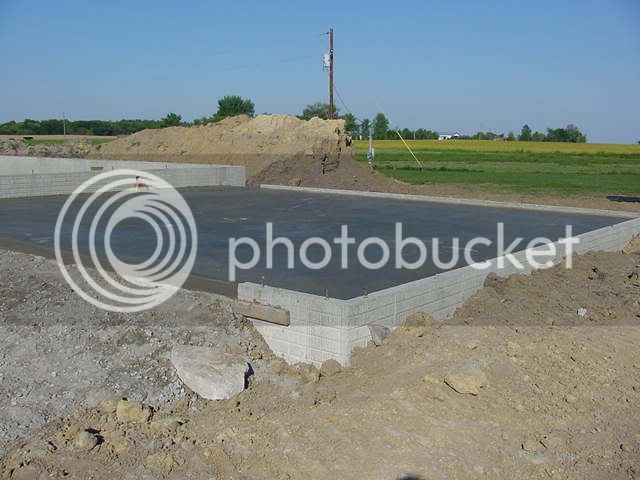
Finished floor
Basement

Garage

The remaining work is mostly plumming and electrical. I did all of that work myself but am not either an electrician or a plumber. Please consult or hire these professhions to do this work if you are not comfortable doing it yourself
I placed the thermostat chest high in my basement and let the garage just be the result of how the basement responded to the system. You could actually create zones but I won't get into that here as I cannot confidently tell you how to do that.
In the winter I can always assume that my garage will be at least 50 degrees F on the coldest days, but my feet are never cold and about four feet of the approach is always melted. To run this radiant system, it cost me less than $50 per month to heat the basement and garage floors.
Now, to be able to suppliment this system or if power goes out, I installed a ventless propane wall heater. We turn this on if we are having a party or family get-together. I plan on doing this to my shop which is 28x36 which is currently holding Jeeps, a boat, ATV's, mowers and other such stuff.
I threw this together in a few minutes, so please let me know if you would like for me to expand on any areas.
Thanks for reading
I spent three years researching before building my new house. Living in central Illinois, one of the main things I was concerned with was heating and cooling. I chose an electric Geo-Thermal system. The cost of this above a forced air gas system was $4000 at the time. I estimate payback next year, being year 4. This did not heat or cool the attached garage.
Since my main garage was attached to the house, there was no way it was going to be cold out there. I'm a wrench guy so this was a must, especially since the house I was leaving had heat in the detached garage. I decided I would heat my garage in two ways. One would be a hot water radiant heating system, the other would be a ventless LP wall mounted heater. The main heating system is the "in the floor" radiant heating system, while the ventless gas system would act as a backup.
I did not build the house but worked with my contractor to schedule time to install the tubing where the concrete floor was to be. I not only installed tubing in the garage floor but also in the basment floor as well.
==================================================
Here is the list of what I purchsed to do the whole job:
PEX tubing 1/2" (there are other brands)(about one foot in length per square feet of area)
PEX clamps
Pex crimping tool
Electric water heater (40 Gal)
Thermostat
Relay
Grundfoss pump
Copper manifolds (One for supply side, one for return side, dependant on the number of zones)
Plywood to mount manifolds
Small pressure tank
Tempurature/Pressure gauge
Water line check valve
Copper tubing for supply side
Shutoff valves (One for supply side, one for return side)(one for each run supply side)(one for Check valve)(all total in this installation is 9)
Styrofoam sheeting (4x8)(Thickeness is dependant on your climate zone)
Heavy wire (9 gauge if I recall)(to be used in bent 2' sections)(act as a stake to hold tubing)
Tools for sweating copper pipe
==================================================
You start with this.
Here the manifolds are mounted to the plywood with tubing runs attached already.
See here where I built a box for the tubing to come up through the concrete so it wouldn't be so rigid at the surface.
Now layout the styrofoam around the perimeter to act as and insulator from the cold edges of the concrete, then lay out the tubing in a grid. Stay away from the wall 12".
Attach to the manifolds shown above. You notice there are six tubes on the supply side and six on the return side. Of the six, four go to the basement
and two go to the garage.
You can buy clamps that screw into the insulation to hold the tubes down, but they did not work for me. I used the 9 gauge wire, cut 24", then bent in half driven down over the tube to hold in place.
Finished floor
Basement
Garage
The remaining work is mostly plumming and electrical. I did all of that work myself but am not either an electrician or a plumber. Please consult or hire these professhions to do this work if you are not comfortable doing it yourself
I placed the thermostat chest high in my basement and let the garage just be the result of how the basement responded to the system. You could actually create zones but I won't get into that here as I cannot confidently tell you how to do that.
In the winter I can always assume that my garage will be at least 50 degrees F on the coldest days, but my feet are never cold and about four feet of the approach is always melted. To run this radiant system, it cost me less than $50 per month to heat the basement and garage floors.
Now, to be able to suppliment this system or if power goes out, I installed a ventless propane wall heater. We turn this on if we are having a party or family get-together. I plan on doing this to my shop which is 28x36 which is currently holding Jeeps, a boat, ATV's, mowers and other such stuff.
I threw this together in a few minutes, so please let me know if you would like for me to expand on any areas.
Thanks for reading