
You are using an out of date browser. It may not display this or other websites correctly.
You should upgrade or use an alternative browser.
You should upgrade or use an alternative browser.
94 Mustang rejuvenation
- Thread starter mustanggarage
- Start date


Help Support House Repair Talk:
This site may earn a commission from merchant affiliate
links, including eBay, Amazon, and others.
mustanggarage
Garageaholic
- Joined
- Nov 26, 2009
- Messages
- 903
- Reaction score
- 0
I looked at walmart. they don't have it. I will check at oreilly's next time I am there.
in the meantime I got some more powdercoating done tonight.
I find the powder sticks a lot better if you preheat the part. so first hang it up with wire, then get out my IR light and heat it up.

then spray the powder on and start baking.
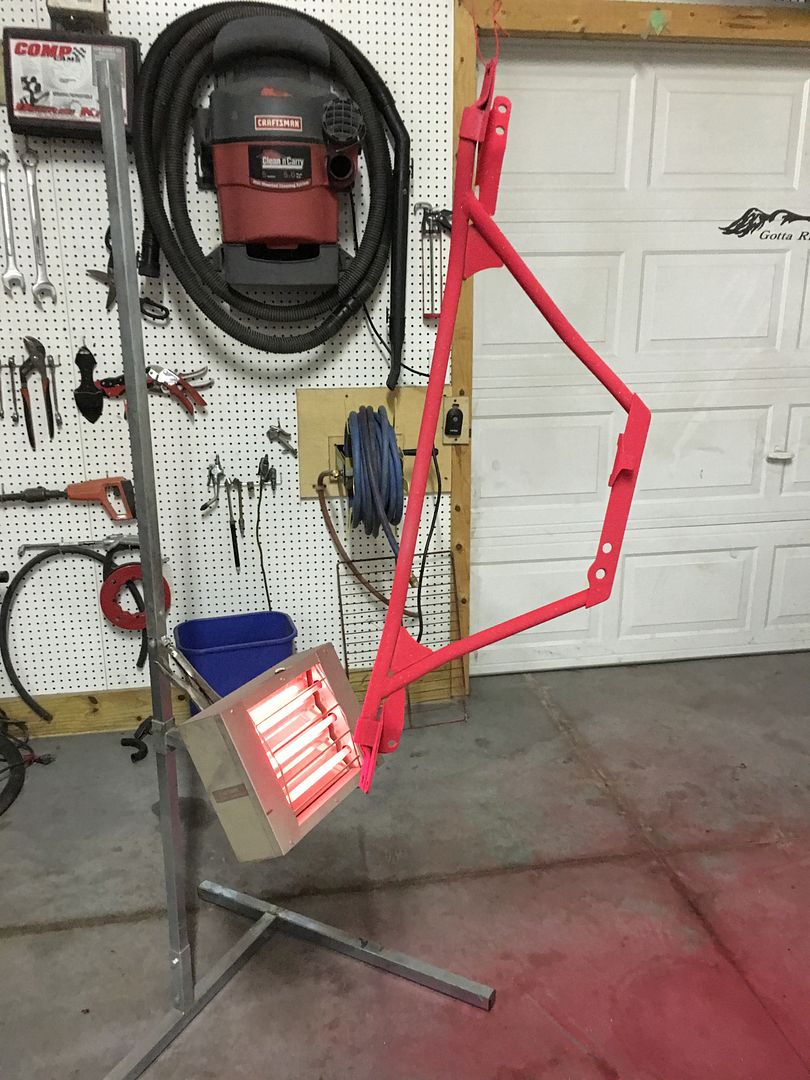
then when I was done there were some areas that I did not get adequate coverage on so I sprayed on some more powder and did it all again. I worked on this for about 3 hours tonight.
but it turned out pretty good.
I will let it cool tonight I could bolt it on about 20 minutes but I don't feel like it tonight lol.
it is so much easier coating things that will fit in my oven lol. but this IR light gives me the capability to do pretty much anything I have the patience for. so it is a useful tool.
in the meantime I got some more powdercoating done tonight.
I find the powder sticks a lot better if you preheat the part. so first hang it up with wire, then get out my IR light and heat it up.

then spray the powder on and start baking.

then when I was done there were some areas that I did not get adequate coverage on so I sprayed on some more powder and did it all again. I worked on this for about 3 hours tonight.


but it turned out pretty good.

I will let it cool tonight I could bolt it on about 20 minutes but I don't feel like it tonight lol.
it is so much easier coating things that will fit in my oven lol. but this IR light gives me the capability to do pretty much anything I have the patience for. so it is a useful tool.
mustanggarage
Garageaholic
- Joined
- Nov 26, 2009
- Messages
- 903
- Reaction score
- 0
I don't know really, I just start at the bottom, and you can see the powder "flow out" it goes from the particulate powder to a liquid and becomes glossy, then you move it around in a circle so you get all sides and always try to keep a "wet edge so that it flows smoothly. it really is something you just kind of have to watch. the good news is that it really is not all that touchy. I did manage to burn a spot on my jeep oilpan once, but in general as long as you keep the light about 3 inches from the part it is pretty forgiving so leaving it on a bit long won't hurt anything and helps to cure it better. the most important part is making sure it is well cured. so I tend to take it pretty slow.
mustanggarage
Garageaholic
- Joined
- Nov 26, 2009
- Messages
- 903
- Reaction score
- 0
I guess I should explain a bit better. you see you have to heat the metal not just the powder so different gauge metal requires different amounts of time to get hot. this went a lot faster than when I did my axle housing. but it is a slow process anyway. with the oven you just pre-heat to 400 then bake it for 20 minutes and your done.
mustanggarage
Garageaholic
- Joined
- Nov 26, 2009
- Messages
- 903
- Reaction score
- 0
oh well I went ahead and bolted it on anyway.
btw I really like the sound of the new exhaust. I will change the fuel filter tomorrow and then get the car off the lift and take it for a drive.

btw I really like the sound of the new exhaust. I will change the fuel filter tomorrow and then get the car off the lift and take it for a drive.
mustanggarage
Garageaholic
- Joined
- Nov 26, 2009
- Messages
- 903
- Reaction score
- 0
Can you use one of those heat guns to cure it?
no idea.
O
oldognewtrick
Guest
What about building a box say big enough to put a axel in for powder coating? Then anything bigger than the oven could just be put in and heated.
[ame]https://www.youtube.com/watch?v=7Q7PK33s-ak[/ame]
[ame]https://www.youtube.com/watch?v=7Q7PK33s-ak[/ame]
mustanggarage
Garageaholic
- Joined
- Nov 26, 2009
- Messages
- 903
- Reaction score
- 0
What about building a box say big enough to put a axel in for powder coating? Then anything bigger than the oven could just be put in and heated.
there are lots of write ups for diy powder coating ovens. but anything big enough to make a difference takes up a lot of space and is still not going to be cheap so for me since I don't do big things that often I can get by. maybe someday I will build a bigger oven. who knows.
mustanggarage
Garageaholic
- Joined
- Nov 26, 2009
- Messages
- 903
- Reaction score
- 0
I don't have much experience with powdercoating, but do remember taking a Honda 50 frame to a professional for powdercoating and damn, this was alot of money!
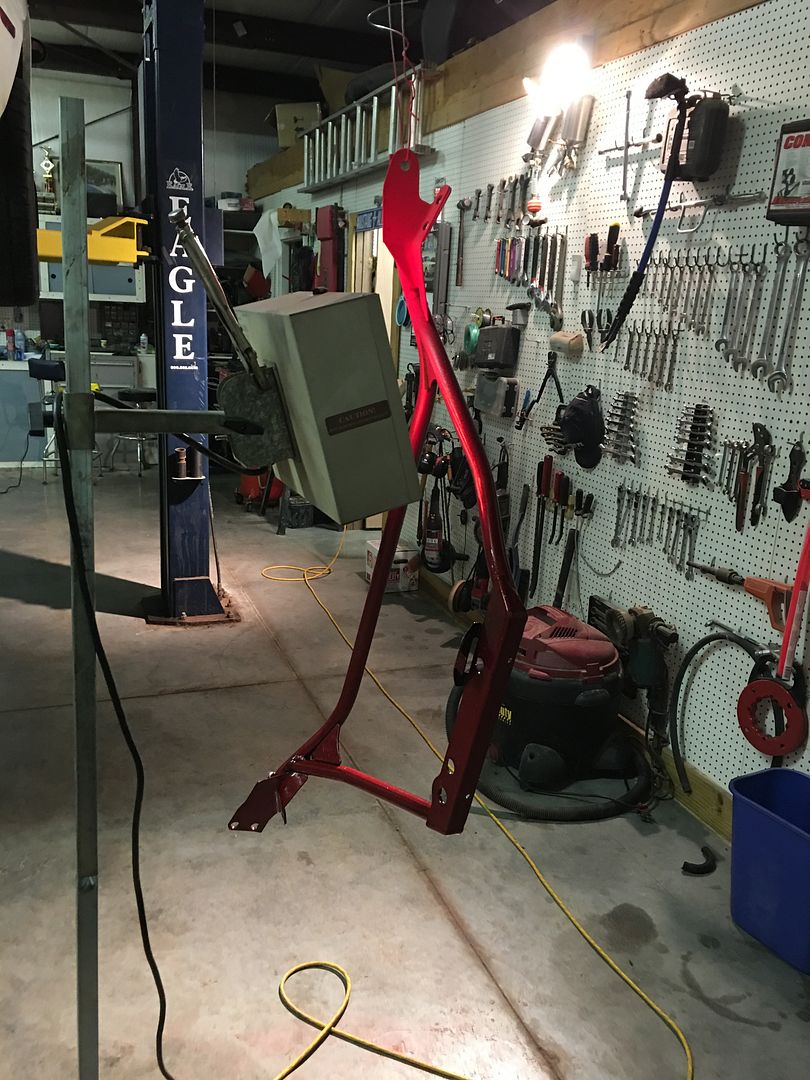
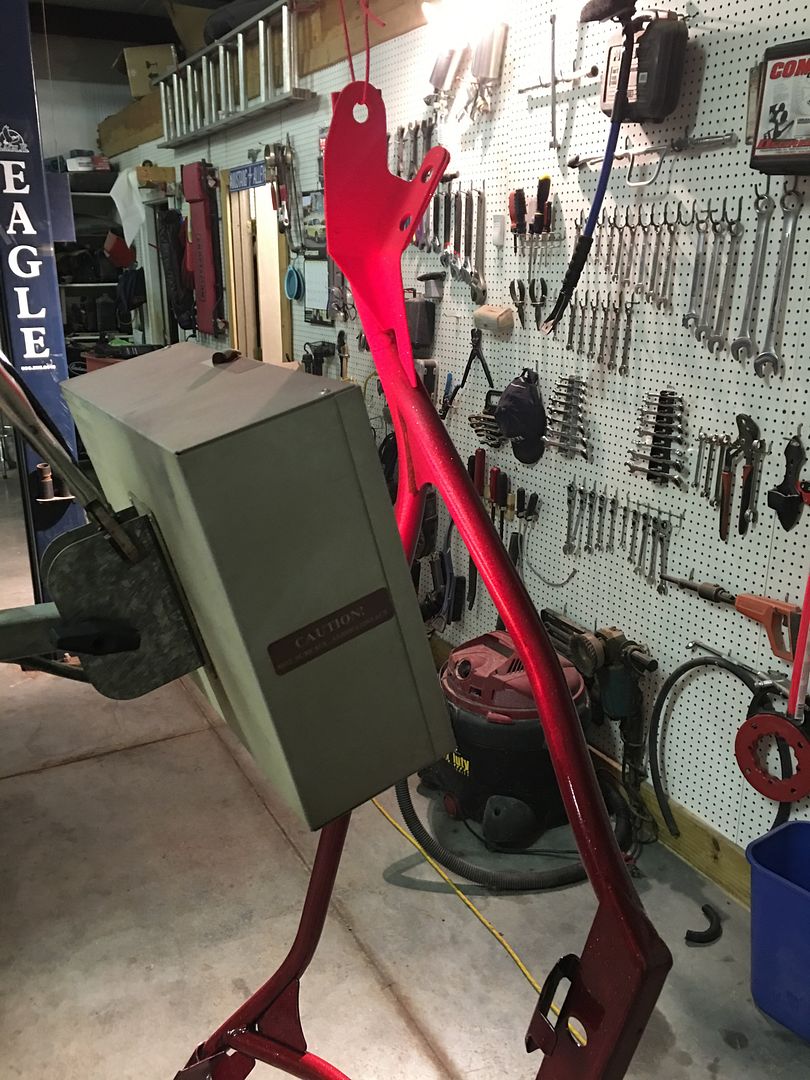
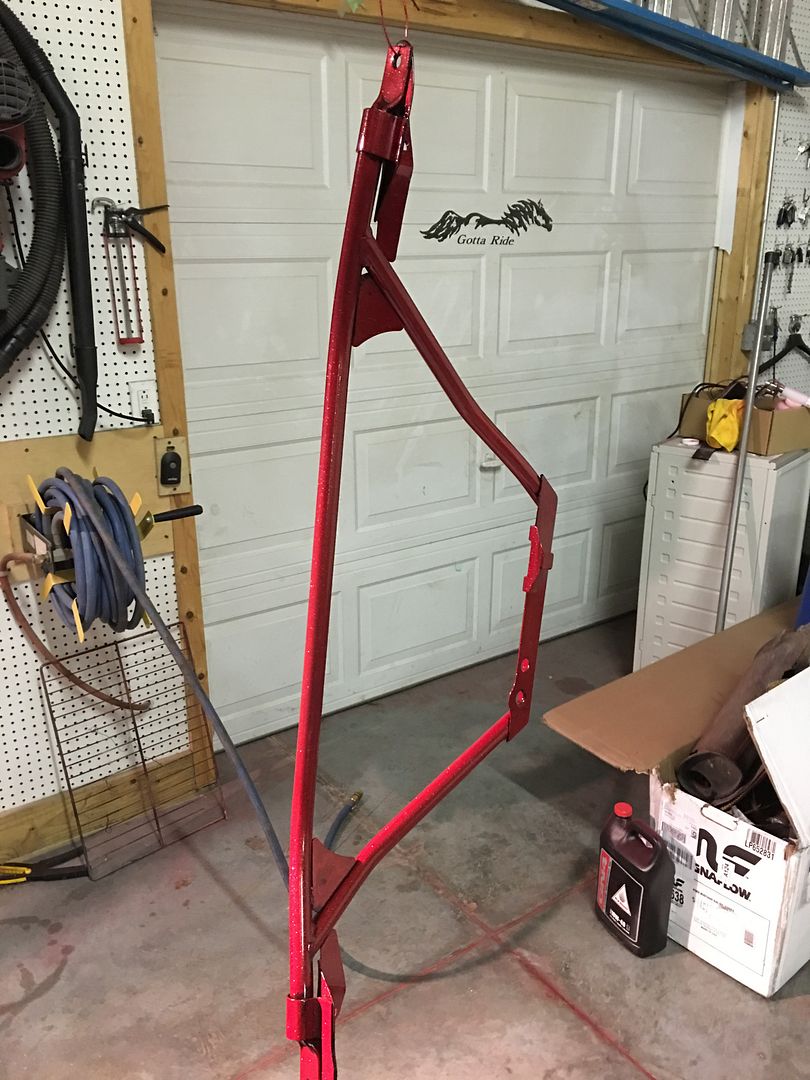
I used pretty much the whole 8 0z bottle of red for the valve covers, the coil mount and the shock tower brace. I wasted some because I like to put it on pretty heavy so I got a fair amount of overspray. it is 18 dollars for one 8 oz bottle, it cost 14 to have it shipped to me. the shipping is not as bad if you by more stuff. but you can get basically the same powder from harbor freight. anyway with just my time and 30 bucks I did all that powder coating. I have long since paid for my equipment.
Chris
Administrator
- Joined
- May 21, 2010
- Messages
- 4,495
- Reaction score
- 29
Amazon also carries powder with free shipping if you have prime. I haven't bought any but I saw it there. I have all my stuff to get started and my buddy who flips houses just came up on an electric oven for me for free so I might give it a try. I am looking at the lamps like you have, how many watts is yours?
O
oldognewtrick
Guest
I was thinking metal studs, fire reared insulation, smooth aluminum sheet covering, heat source, freezer door for access and a way to hang it from the rafters what not in use. Just a thought.
mustanggarage
Garageaholic
- Joined
- Nov 26, 2009
- Messages
- 903
- Reaction score
- 0
awesome diy powder coating oven instructions.
http://www.powdercoatguide.com/2014/09/how-to-build-powder-coating-oven.html#.V_fVoiTFmh4
1800 watts.
http://www.eastwood.com/infra-red-powder-curing-lamp-1800-watts.html
http://www.powdercoatguide.com/2014/09/how-to-build-powder-coating-oven.html#.V_fVoiTFmh4
1800 watts.
http://www.eastwood.com/infra-red-powder-curing-lamp-1800-watts.html
O
oldognewtrick
Guest
Here's a thought, build it so all the walls and roof can be taken apart for storage. Then it won't be in the way as much...just another random mussing...
mustanggarage
Garageaholic
- Joined
- Nov 26, 2009
- Messages
- 903
- Reaction score
- 0
today I went over and got my Dad from the nursing home. he is still able to get out and about, and although he has very little endurance these days, he is still the best mechanic I know. So I brought him over to "supervise" some work on the vert. I really wish I had come up with a better title for my thread now. it was kind of tongue in cheek when I did it, but I am liking this car so much now that I feel like I am insulting my buddy lol. anyway onward and well, onward.
first thing I did was to paint my door hinges. It looks unlikely that I will get those swapped this weekend, but we will see.
then I put the car on the lift, pulled the wheels off and started removing the rear control arms. first I supported the axle with my screw jacks. then unbolted the shocks in the trunk. then removed the rear sway bar and swapped the speed nuts to the other direction as they say to do on the LMR website. then I sanded it down and painted it with vht black paint.
then I removed the shocks, and the springs, and tried to remove the bolts from the lower control arm.
and this is when things started down the typical murphy path every project I do seems to follow lol. now in the video they just unbolted the lower control arms and they came right out, but that was not how it went for me lol. the bolts had seized inside the sleeves of course. just like trying to remove the leaf springs on my 65. what a pain in the butt. I ended up having to cut the heads of the bolts off with a 4 inch angle grinder and then drive them out with an air hammer. but I finally got them out. both sides had to be cut out like that. the upper part came out easier. so once I removed the lower control arms I cleaned up the mounting brackets with brake cleaner and a steel brush then painted them with rustoleum gloss black. then after that dried we put the new lower control arms in place. then removed the uppers and put them in place. everything went fine until the last control arm. for some reason the last metal tube that went inside the upper bushing was 1/4 inch longer than all of the others. now I know the later model cars had a larger bolt and sleeve, and this one was the correct one, it was just too long. so I had to cut it off a bit to get it to fit. once I had massaged all that and finally got the upper control arms in I put the new lowering springs in.
here is a little tip for anyone doing this. it is probably obvious to everyone but me lol. anyway when putting the new springs in, I dropped the screw jacks all the way out and tried to put the new springs in, It was a struggle until I got smart and put the screw jack back in on the opposite side and lifted the opposite side up, that dropped the side I was working on enough to get the new spring and isolater in easily. then repeat on the other side.
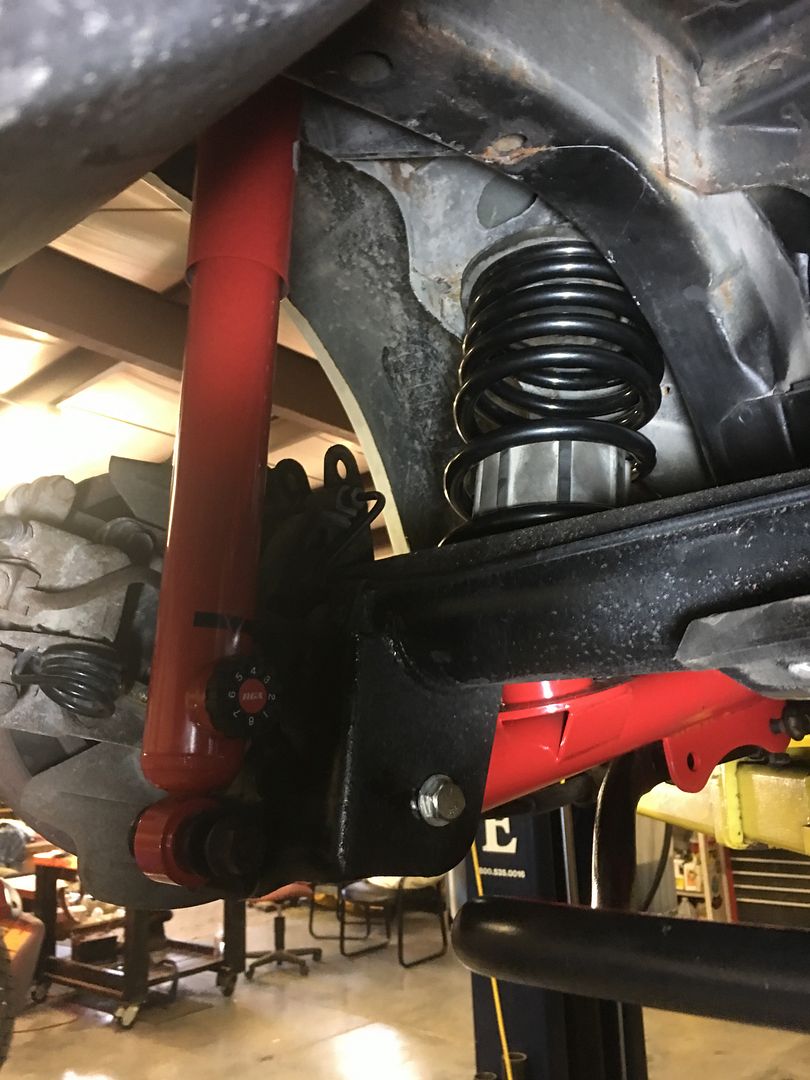
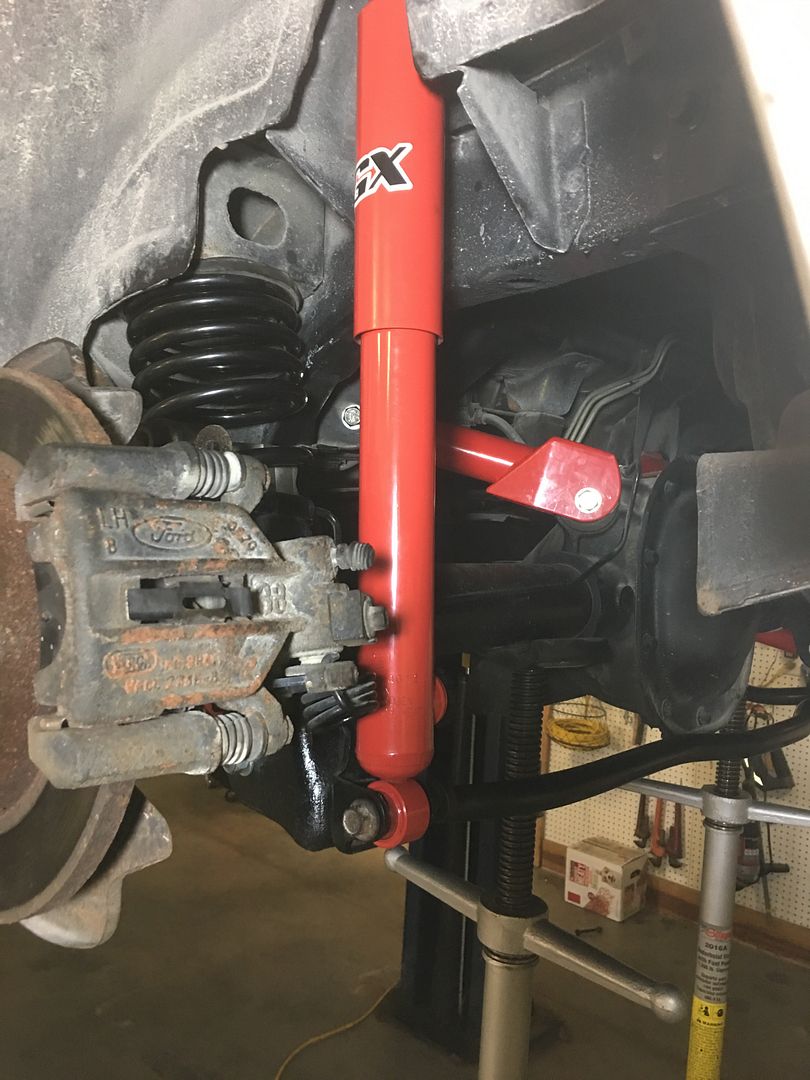
after that I installed the new kyb agx adjustable shock and the sway bar. the instructions do not tell you how the heck you are supposed to mount the emergency brake bracket back to the sway bar mount now that the bolt is coming from the other side. There did not seem to be enough threads coming through to get a nylock nut on there so I went to orshelins and bought a couple longer 10mm bolts and nylock nuts and that worked perfectly.
then I removed the pinion snubber bracket and removed the old snubber from the bracket.
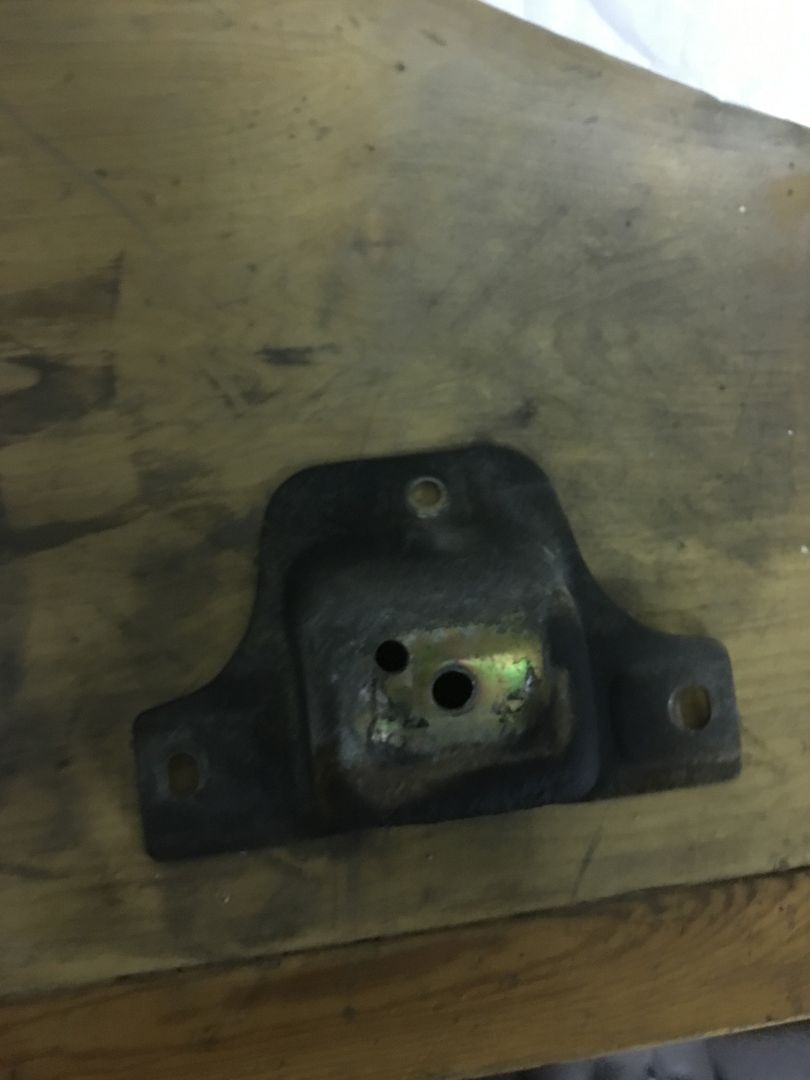
then cleaned and powder coated the bracket and installed the new snubber.
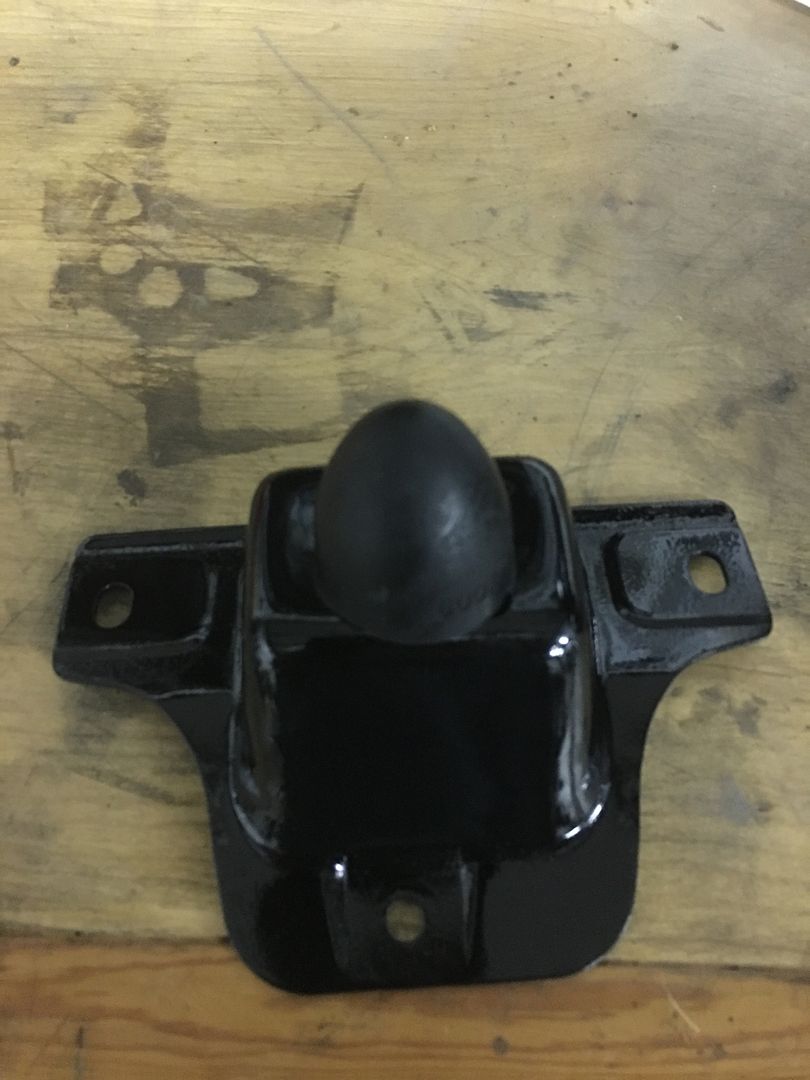
bolted it back in. torqued everything but the bottom bolts on lower control arms to 60 foot pounds. put the wheels back on and dropped it on the ground to torque the lower control arms to 60 footpounds.
and finally I am done. with that part. tomorrow I will tackle the front. hopefully it will go a bit smoother, but knowing me I will not be holding my breath.
first thing I did was to paint my door hinges. It looks unlikely that I will get those swapped this weekend, but we will see.

then I put the car on the lift, pulled the wheels off and started removing the rear control arms. first I supported the axle with my screw jacks. then unbolted the shocks in the trunk. then removed the rear sway bar and swapped the speed nuts to the other direction as they say to do on the LMR website. then I sanded it down and painted it with vht black paint.
then I removed the shocks, and the springs, and tried to remove the bolts from the lower control arm.
and this is when things started down the typical murphy path every project I do seems to follow lol. now in the video they just unbolted the lower control arms and they came right out, but that was not how it went for me lol. the bolts had seized inside the sleeves of course. just like trying to remove the leaf springs on my 65. what a pain in the butt. I ended up having to cut the heads of the bolts off with a 4 inch angle grinder and then drive them out with an air hammer. but I finally got them out. both sides had to be cut out like that. the upper part came out easier. so once I removed the lower control arms I cleaned up the mounting brackets with brake cleaner and a steel brush then painted them with rustoleum gloss black. then after that dried we put the new lower control arms in place. then removed the uppers and put them in place. everything went fine until the last control arm. for some reason the last metal tube that went inside the upper bushing was 1/4 inch longer than all of the others. now I know the later model cars had a larger bolt and sleeve, and this one was the correct one, it was just too long. so I had to cut it off a bit to get it to fit. once I had massaged all that and finally got the upper control arms in I put the new lowering springs in.
here is a little tip for anyone doing this. it is probably obvious to everyone but me lol. anyway when putting the new springs in, I dropped the screw jacks all the way out and tried to put the new springs in, It was a struggle until I got smart and put the screw jack back in on the opposite side and lifted the opposite side up, that dropped the side I was working on enough to get the new spring and isolater in easily. then repeat on the other side.


after that I installed the new kyb agx adjustable shock and the sway bar. the instructions do not tell you how the heck you are supposed to mount the emergency brake bracket back to the sway bar mount now that the bolt is coming from the other side. There did not seem to be enough threads coming through to get a nylock nut on there so I went to orshelins and bought a couple longer 10mm bolts and nylock nuts and that worked perfectly.
then I removed the pinion snubber bracket and removed the old snubber from the bracket.

then cleaned and powder coated the bracket and installed the new snubber.

bolted it back in. torqued everything but the bottom bolts on lower control arms to 60 foot pounds. put the wheels back on and dropped it on the ground to torque the lower control arms to 60 footpounds.
and finally I am done. with that part. tomorrow I will tackle the front. hopefully it will go a bit smoother, but knowing me I will not be holding my breath.
O
oldognewtrick
Guest
Title can be changed, what do you want it to be?
mustanggarage
Garageaholic
- Joined
- Nov 26, 2009
- Messages
- 903
- Reaction score
- 0
Title can be changed, what do you want it to be?
I think 94 Mustang rejuvenation would be a better title. people would at least know what it was then.